We will do a simple build for everyone wanting to get going fast, and fill in the details as we go.
This guide will be to build what we consider to be the least expensive, but effective miner for a beginner on a budget.
We will be working on this guide, and update it as we go. Once complete, we will go through getting your miner to bring home some Megacoins.
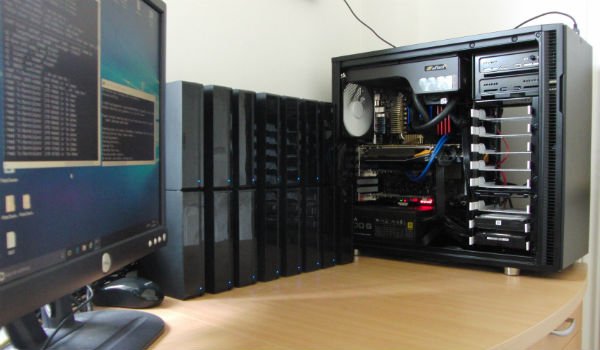
First we suggest you pick a case. Some people go with milk crates, or even mounting motherboards on plywood, or metal shelves. For most builds, I suggest using a case. It gives your components stability, and makes your miner portable. For this build we will be using the Rosewill Challenger case.
Ways To Get Megacoin
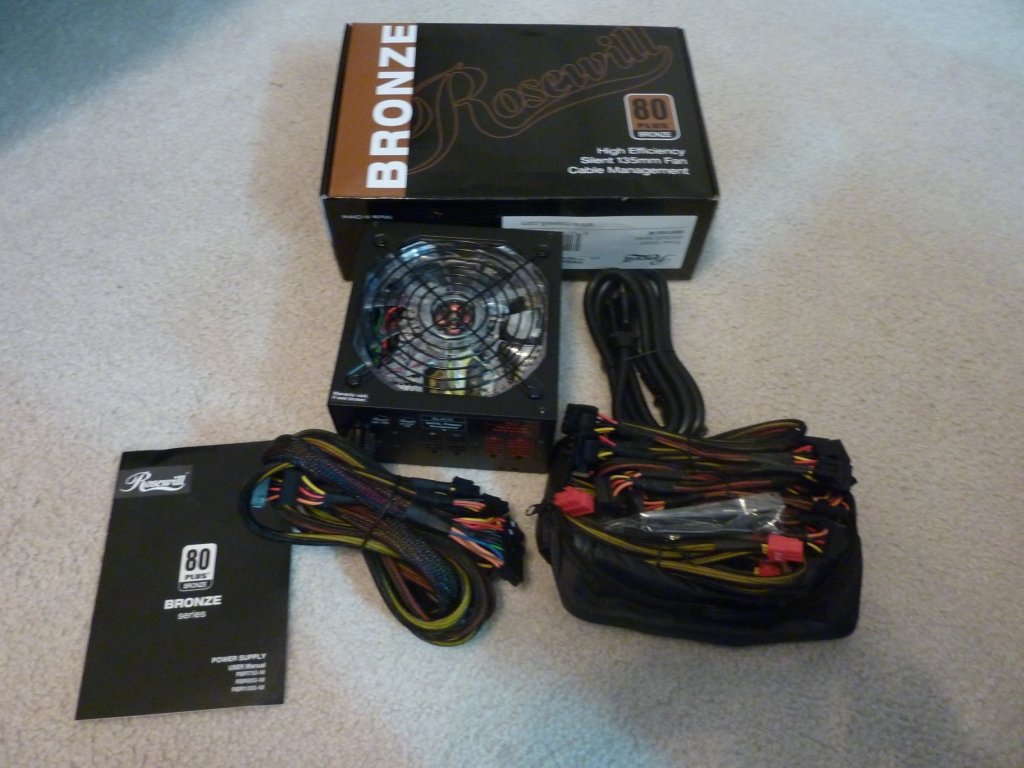
The next part of our solid mining foundation will be the power supply. We want to get by on the cheap, but we don’t want to cheap ourselves. So the budget supply I chose is the 1000 watt Rosewill 80 Plus Bronze semi modular supply.
This one was $69 after the $20 rebate, and includes a nice little zip bag for your modular cables. The reason we spent an extra $20 here is that it will allow us to add another video card when the budget is looking better.
Main Components for Megacoin Mining
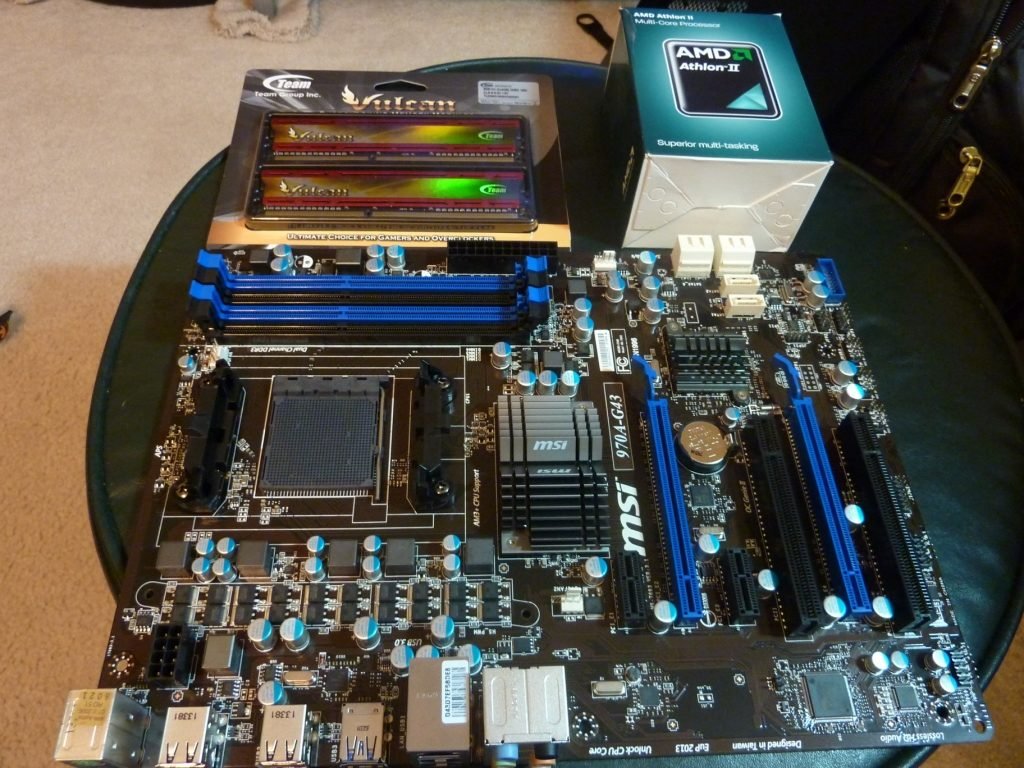
I selected the MSI 970A-G43 motherboard because it’s reliable, cheap, and has two PCIe graphics slots. Got this one for $49 after a $10 rebate. We want 4gb of memory for each card, so I picked 8gb of Team Vulcan DDR3 1600 for another $49. An AMD Sempron processor is $30 cheaper, but I went with the $69 triple core AMD X3 455 CPU @ 3.3 Ghz. Our bargain motherboard will allow us to unlock the 4th core, and some are reporting 4ghz overclocks on this one. This should also allow decent gaming performance if you decide to pause mining, and give up some of your Megacoins
In this photo I have left out the graphics card to give you a good view of everything else. Just follow the manual to connect each of the cables, and try to route them in a tidy way for good air flow. I installed a $16.99 ASUS DVD burner, and a 1tb Seagate Barracuda 7200 RPM refurbished hard drive. At $49, a few extra bucks here will give lots of storage and good gaming performance if you need a dual use machine.
AMD core of our Megacoin Scrypt engine
Here we see the AMD core of our Megacoin Scrypt engine, a Gigabyte Radeon 7950.
So with the $299 cost of our graphics card, we are looking at a total of $577 for our hardware. This assumes you can come up with an existing monitor, keyboard, and mouse. We have built in room to grow with a spare PCIe slot, and plenty of extra power and cables.
supporting Applications
Setting Up Software
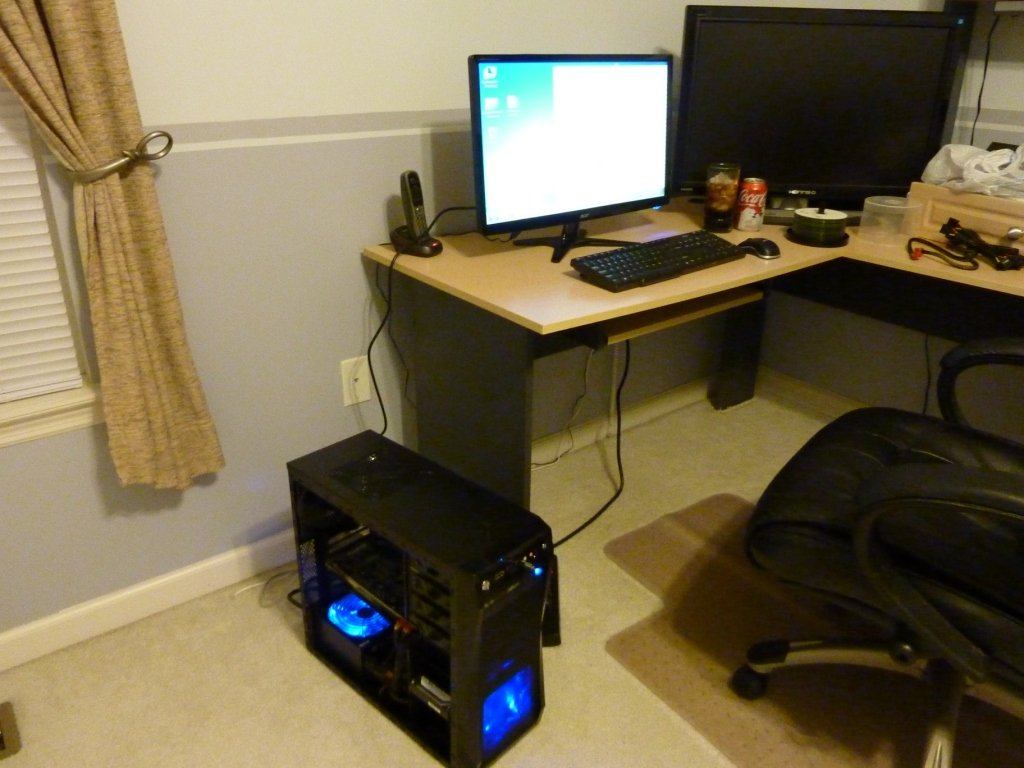
So if all your wiring is correct, you should be able to plug everything in and your rig should power up. If you have your Windows 7 disk in the drive, you should see it start to load. I won’t go into all the details of setting up Windows, but once it’s complete make sure to change you power settings in the Control Panel for High Performance, or it will start to sleep after mining for a short time.
Applications For Mining Megacoin
The next thing you will want to do is load the factory driver disk. I suggest un-checking any crapware that comes on it ( I did check the USB 3.0 driver. We will select our own utilities.)
Next, we need to download the utilities we will need to start mining. GUIminer Scrypt, MSI Afterburner, and the latest AMD graphics driver. For my build, I also installed Malwarebytes, and a few other apps I find useful. I would suggest putting all your apps, and reference info on a flash drive for future ease in setting up.
GUIminer Scrypt is in a zip folder, so I extract it to a folder on my desktop, and make a shortcut to the .exe file.
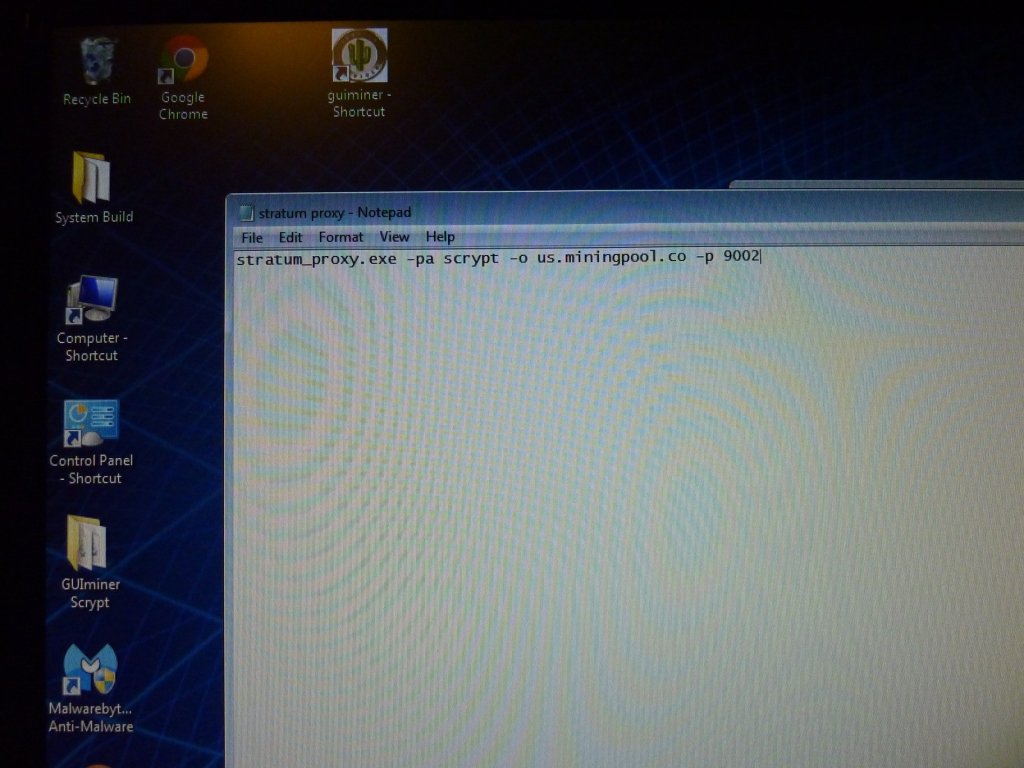
Go ahead and install Afterburner, and the video drivers. Once you have this done, we need to join a pool and setup some workers. Next we will create our Stratum Proxy. You can copy the one in GUIminer Scrypt to your desktop. Open that folder, and make a new text file called Stratum Proxy.bat, Then depending on the pool you chose, we need to enter the address, and port. It will look something like this…
Setting Up GPU
Once complete, save your new Stratum Proxy. Then double click it to see if it tries to connect. If Windows asks for an exception, say yes, and you are good. Go ahead and kill the proxy for now.
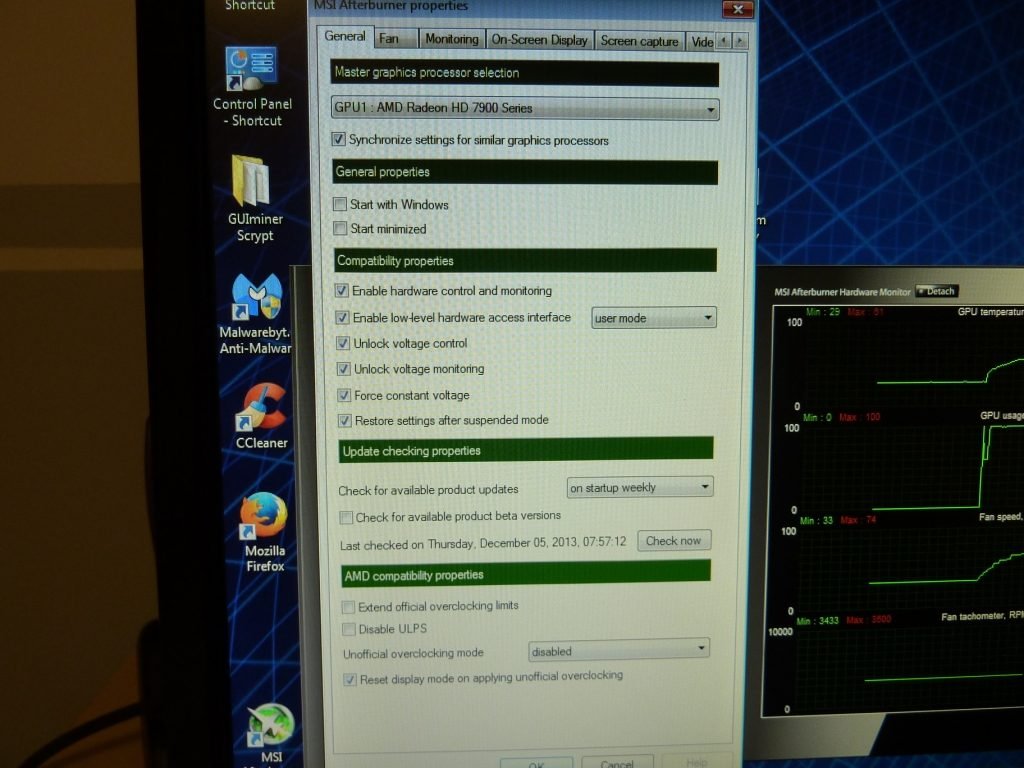
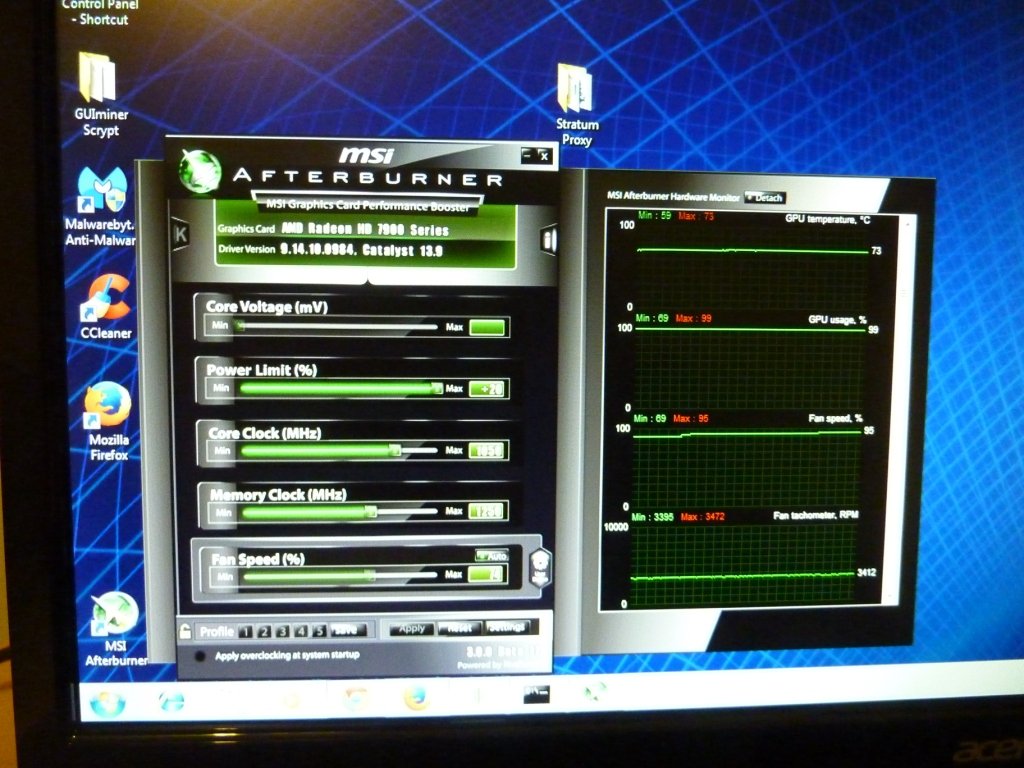
Next we will start Afterburner. Under Settings you will want to check all the boxes under Compatibility Properties.
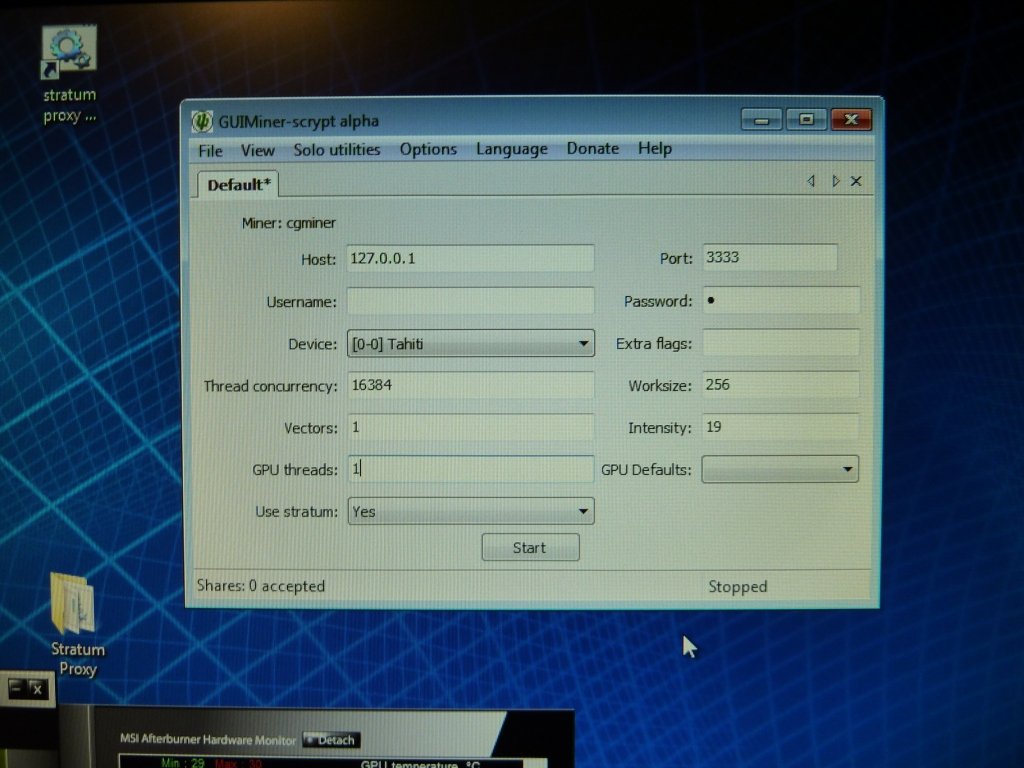
GUIminer Scrypt
Go ahead and double click GUIminer Scrypt to setup your miner. The host should be 127.0.0.1, and port 3333. For our 7950, the best thread concurrency I’ve found is 16384. Put in your own user name, and a . after it, type the designation of worker number you chose.
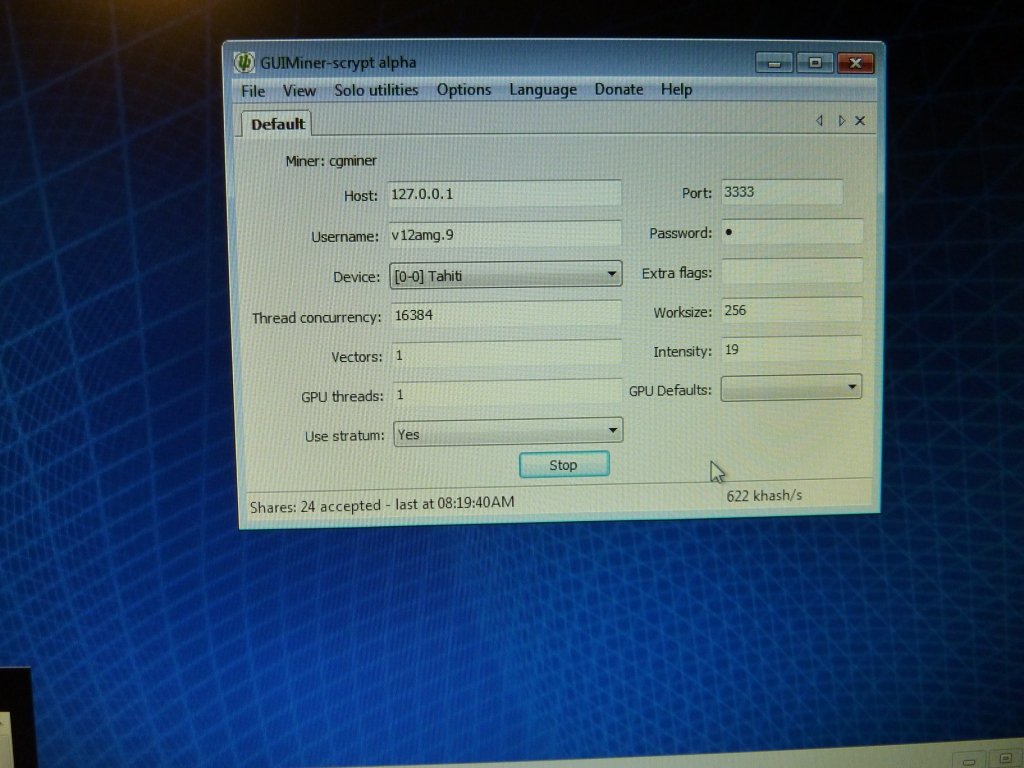
Then double click your stratum proxy.bat, or the shortcut you made. Once it is connected, click start in GUIminer Scrypt. If you did everything right, you will see your card is now hashing and making Megacoins!
Temperature Check
Keep a close eye on the temperature, and make sure the fans are running properly, and the card is running cool and stable.